
1 - The Gatehouse world
Introduction
In the introduction you learn that an interplanetary message has been intercepted.
It has been decoded and reads like this:
Danger. Ozgar has been defeated but not destroyed. Suralon is sinking. Return to Arkonia. Abandon all colonies at once.
Who is Ozgar and where is Arconia.
After this message there is a lot of activity in space. It's uncertain what is happening.
Eventually you are told that you have been chosen to save the threatened planet.
You must find Arconia and destroy the evil Ozgar. Your spaceship lifts from the base.
The Gatehouse World
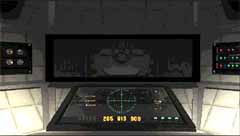 When the game starts you have just landed in an unknown world. Look around the cabin. There are a lot of instruments. Take a note of your position, 285 016 909. You might need it to return here some other time.
Turn around and click at the door. Click again at the wheel when you are in close-up to open the door. Enter the outer room.
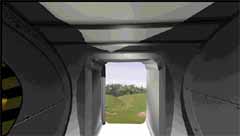
 Turn to the left and leave the ship. It is green and nice outside. Walk straight between the hills and you'll reach a small stone cottage. Open the door and enter.
The room is dark.
At the wall to the left hangs a roughly used tapestry. Look at it. At he bottom left is the image of an open book. It differs from the other images and could be a lead of sort. You probably should search for some books. The room is bare, only a table at the back. To left and right there are openings to other rooms.
 Enter the room to the left. Rather bare too. Only lit by torches on the walls. Turn left and go to the torch.
Click at it to get a close-up then click again at the hotspot.
A drawer is opened to the right. Look at it. It contains some books.
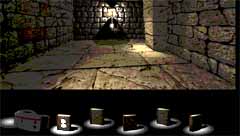 Click at the upper book and they will all be transferred to your back pack at the bottom left of the screen. Click at the back pack and it will turn over and spill it's contents. You have got five books. Look at them every book has a symbol on it's cover. The symbols look Chinese.
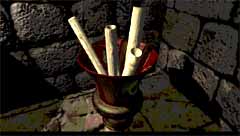 Go to the right to the urn in the corner. It contains some scrolls. Go into close up and take the only one you can. Look at it. It looks like a floor plan of this house. You need to put it on a table to be able to examine it closer.
Go to the middle room and to the table in the back. Click at the table to get a close up. Then spill your back pack and click at the scroll. It begins to pulse. That means the scroll is active and you can use it elsewhere.
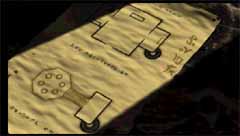 Click at the table. The drawing is put there and you can take a closer look at it. There are drawing of two different planes. The upper one must be where you are standing just now with a smaller room to the left and right. Even the table is drawn.
Look at the right room. The round thing in the lower right corner looks like a staircase.
This staircase can also be found in the drawing of the lower plane. From the rectangular room a passage of sorts leads to an octagonal room with six round pillars.
Look at the right margin of the drawing. The symbols there match some of the symbols on the book. This must be important. Take a note of the symbols, in the order they are given.
Now it's time to go looking for the stairs.
 Go to the right room and to the torch at the right short wall. Click at the torch.
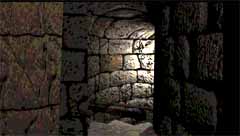
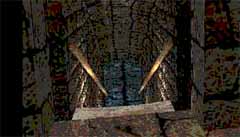
Then turn left and you can see that a spiral staircase is visible.
Go downstairs. It is only a small room. It must be the rectangular one on the drawing. There should be a passage of sort but none is visible. It must be hidden like the stairs.
Look around. Where the passage ought to be, there is an alcove but no mechanism to handle it.
 Go upstairs again. At one side of the room there is a narrow window and to the left of the window a small shelf. Take a closer look at it. It could be a bookcase. Maybe for the books you found earlier. Spill your back pack and look at the symbols on the books. Chose the ones with the symbols shown at the drawing and put them at the shelf in the right order. Book NR. 1, 2, 3 and 5 in your inventory. When the forth book is correctly placed you hear a rumbling sound.
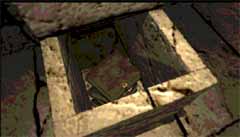
 Go downstairs again. Now the small alcove has been opened and a staircase leads down.Go down.
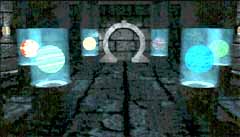
You enter a room with six transparent cylindrical pillars. It is the room shown at the drawing.
In the back there is a horseshoe shaped stone frame on the wall.
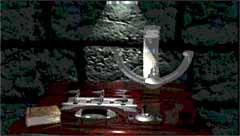 Go to the small table at the right wall. Pull the lever and you'll see a hologram from Arla's diary. Arla is the daughter of the gatekeeper and she is also custodian of the Crystal Key. She says she has not destroyed the key, as her father wished, only hidden it and the books. She hopes they all can return in the future. For the time being their leader has ordered them to leave.
When you have listened to the message click at the book to the left.
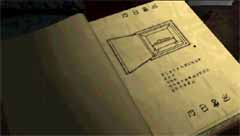 Click the right edge of the book to open it.
It shows a graphic of a compartment. Inside is a box with five buttons of different height. There are also five unreadable lines of different length.
Look around the room and see if you can find a compartment, like the one on the picture. To the left of the horseshoe shaped frame there is a small compartment but it is locked and looks different. You have to look elsewhere.
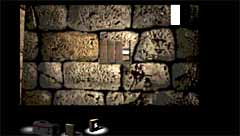
Go upstairs. Look at the wall in front of you. There is a stone with a ring to the left of the winding staircase.
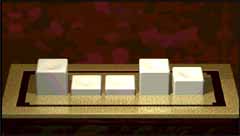 Look at it in close up and click at the ring. The compartment is opened and you can see the box with the five buttons.
The buttons can be drawn to different heights. Remember the different length of the lines in the book.
Draw the buttons so that their height correspond to the length of the lines. Long, short, short, long, medium like the picture to the right.
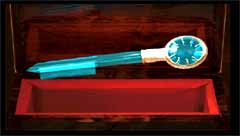
 The box is opened and there is the famous Crystal Key.
Now you must find a place to put it.
I might be the small box you saw downstairs.
Go down to the box.
 Click the key in inventory and then click the keyhole at the box.
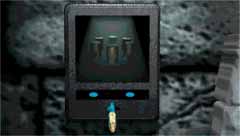
You'll se a simplified image of the room with the six pillars. This could be the panel to a portal.
Click at the right blue light. The image changes and shows a golden bowl-like thing.
 Click at the image. The portal is activated.
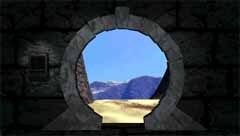
The stone wall vanishes and shows an image of a desert and mountains.
The Crystal Key is returned to your back pack.
Click at the portal to pass through it.
The pictures are taken from the game. The homesite is private and has no connection with the named company