
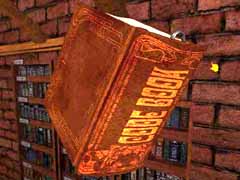
2 - The Alchemist and the Genie
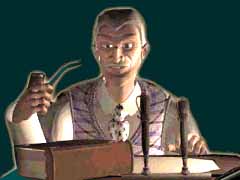
 Nathan Meister is a learned man but he has a secret. He wan a lot of medals in the war but he lost a woman. He has constructed a test, a real challenge to human intelligence, to see if you can find his secret,
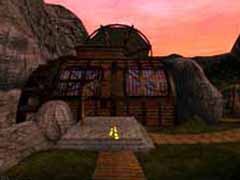
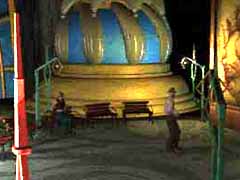
Nathan lives in a house that Theodore has built just as Nathan wanted it.
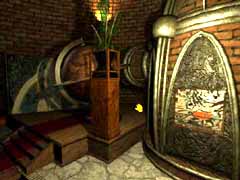
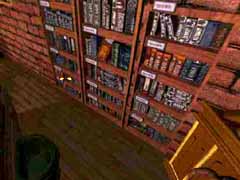
The Library
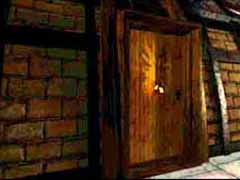
 Walk to the back of the house. Open the door and enter. Take the stairs at the left to the library.
Examine everything in the room, pictures, books, what is hidden in drawers and perhaps in the fireplace.
Sometimes you hear comments when you look at things. Listen carefully and you'll get many clues.
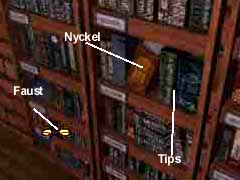
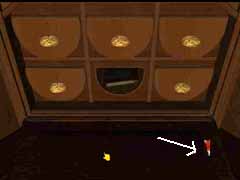
 Start with the books at the left wall. Point at the labels. If you click to the right on the forth shelf from the bottom in the middle row you'll get the clue "Mathematics is magic and code is the key". Pick up the big book Codes to the left in the same shelf. Take the key.
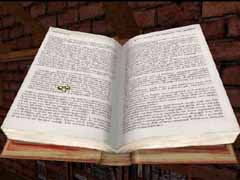
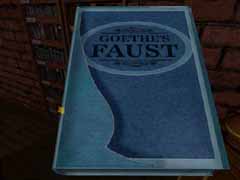
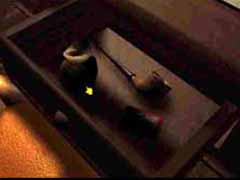 On the upper shelf in the middle row you find a book about the Second World War. Open it and you'll hear about Operation Fortitude. Click at the book Faust at the lowest but one shelf in the left row. You'll learn that Nathan is studying Magic to found out about the secrets of Nature. Look in the desk drawer behind you and take the matches. Click "the glasses" at the desk. Surprised?
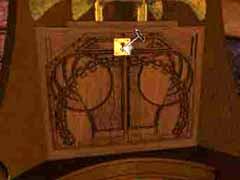
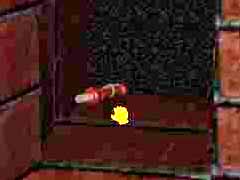
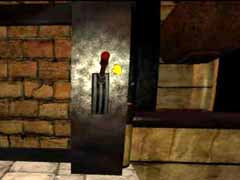
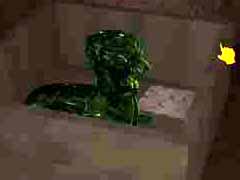
 To the right of the bookcases their is a cabinet. At the lower part there are two wooden figures one with a missing head. The cabinet is locked. Use the key you found in the book to open it. The flap comes down. Look at it. Under the blotter at the right you can see the corner of a paper sticking out. Take it. It is a geological map.
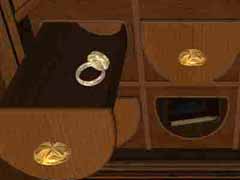
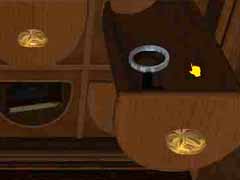
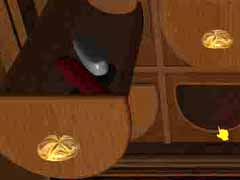
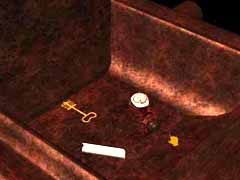
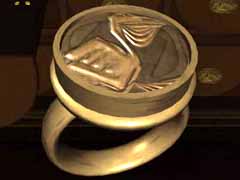 Open all the drawers and examine what you find. In the top left drawer is a signet-ring. Look at the signet. It looks like a pelican. Also take the magnifying glass and the paper knife from other drawers. (You can't take the book.)
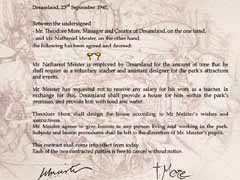
Read the letter from Dreamland.
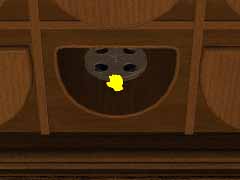
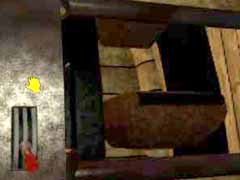
 The lower right drawer is a bit tricky. First open this drawer. Then without closing it open the lower left drawer. Don't close it and open the lower right drawer again. Now you can take the wooden head from the back compartment.
It is the missing head to the left sculpture.
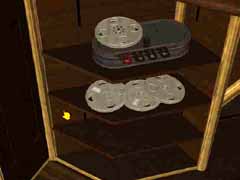 Use the head on the sculpture and you can open the lower part of the cabinet. First pick up all three tapes. Go to the inventory and pick up the tape named Tape 1. (In some versions only Tape.) Put it on the tape-player and then press "Play" (the rightmost button).
 Listen to the message. Nathan is worries about the twins. He has noted during the lessons he gives them that they are getting more and more aggressive.
Take a look at the fireplace. On a burned piece of paper you can read a few words and you also hear Nathan speak to a woman.
The Bedroom
 Descend the stairs and enter the bedroom under the left staircase.
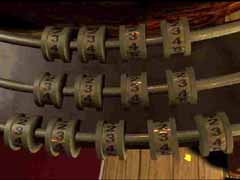
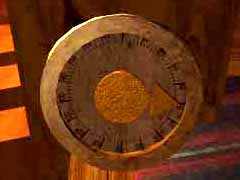
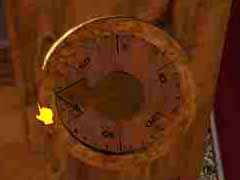
A big globe looks interesting. If you take a closer look you can see it is locked with a code-lock. There are three rows, The two upper ones with four digits the lowest with five. You must find some clues to the code.
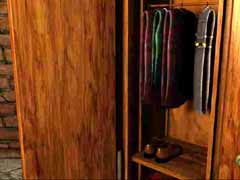
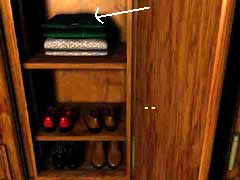
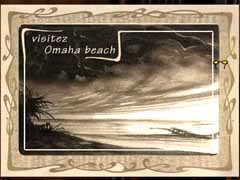 There is a big cabinet with four doors. Open the second door from the left and click at the gray robe. You get a post card with the words "Visit Omaha Beach". Click once more and you can read A=0 at the back. It could be a clue to the globe-code.
 Open the second door from the right. At the upper shelf lies some clothes. Take a closer look and you'll find a paper. It is difficult to read, you must use the magnifying glass. It is an instruction how to open a letter without breaking the seal. Could be useful, who knows?
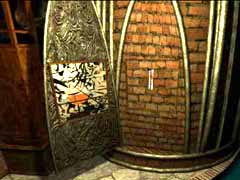
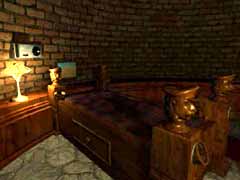
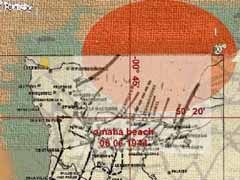 A big four-poster bed takes up most of the room. Under the bed is a locked drawer. Opposite the bed is a painted glass-door. The picture reminds of the geological chart. Open the door and use the chart on the brick wall. Then close the door . You have got a map of Omaha Beach with the coordinates 50 º 20 and 0 º 45. It is the second time you see the word Omaha, it must mean something.
You'll hear about Operation Fortitude again and you see the date and the year entered in the upper two rows in the code-lock. (This is the date for the Invasion in Normandy in the second world war.)
 On each bedpost is a wheel that can be turned to different degrees. First turn the wheels at the head of the bed., the left to 50 and the right to 20.
Then go to the left poster at the foot of the bed and turn it first to 40, Then very slowly turn it a little bit at the time. When you reach 45 the box will open.

It is rather tricky to do. It is dark and difficult to see. 50 and 20 are rather easy. The third one already says 0 bat I had to turn it the whole circle to make it work. Put the last one at 40 and then carefully a little bit at the time until the drawer opens.
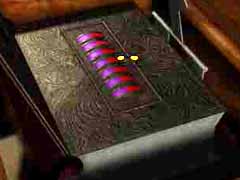
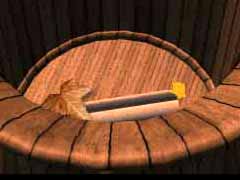
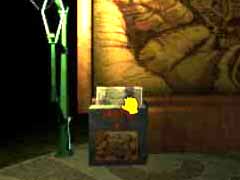
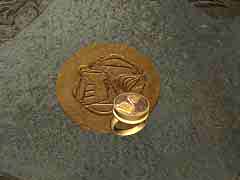 There is a box in the drawer. Look at it twice to get a close-up. Look at the picture. It looks like a pelican just like the ring. Use the signet ring on the box to unlock it. Pick up the code wheel.
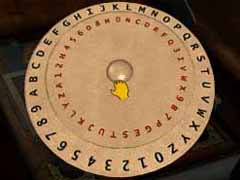
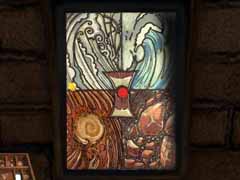
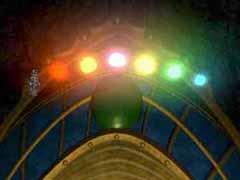
 Look at the book to get a close-up. The lock is a sort of color wheel. Look around. To the left of the globe is a tapestry with a picture of a rainbow. Note the order of the colors from top to bottom. Violet, indigo (dark blue), blue, yellow, orange, red.
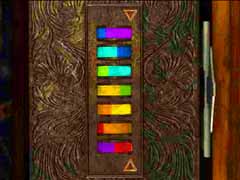
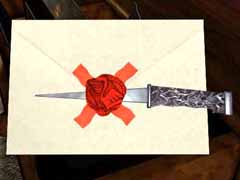 Return to the book and enter the colors in the same order from top to bottom. They shall be aligned with the right edge to open the lock. Take the letter. Open the letter using the instruction you found earlier.
Place the paper knife to the right of the seal. Hold down the mouse button and move the knife carefully to the left, behind the seal, then down.
If you fail, the letter bursts into flames, but you are always allowed another try.
 It was evidently just training. Look at the code wheel. You can combine letters and digits. You have also seen how the two first rows of the globe lock were set to the date and year of the Invasion. OMAHA is the place of it. It has five letters and is probably the code for the third row. But it has to be turned into digits and here the code wheel can help you. You already know that A=0. Align A with 0, look up the other letters and note the corresponding digits. You'll get the code 79030.
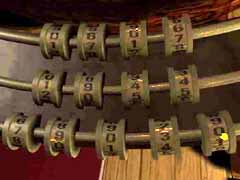
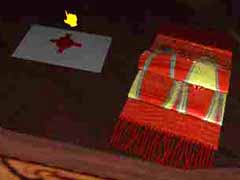 Go to the globe and enter the combination 79030 in the third row. The globe opens and you find a scarf and another sealed letter.
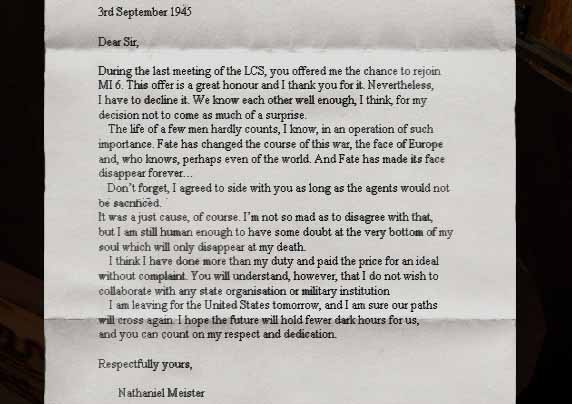
Open the letter the same way as before. Read it.
The Library
 You'll be transported to the library to hear Mephisto offer a contract to Nathan, but he refuses.
You'll find yourself in front of a book case but it is the wrong one. Instead turn around to the one you have examined before and get the book Faust at the lowest but one shelf in the left row. You'll get told about treasure hunting. (If you want to read about it, you must have Subtitles turned on in Preferences.)
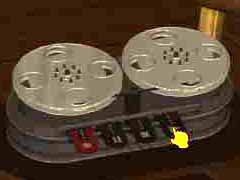
 Open the drawers and search them once more. This time you'll find a forth tape in the cubbyhole and three colored chalks. Pick them all up. Open the lower part again and use the tape at the player. Don't forget to turn it on. You'll hear Nathan talk about his assistant and how you can revive him using the right ingredients.
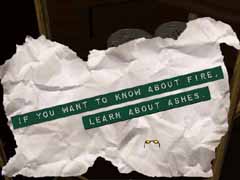
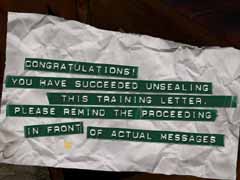
 Look at the paper to get the clue "If you want to know about fire, learn about ashes."
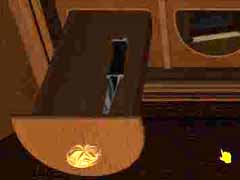
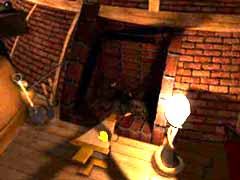
The treasure hunt has started. Ashes are found in the fire place. Go there and click at the bellows to blow the ashes away. There is a hidden compartment.
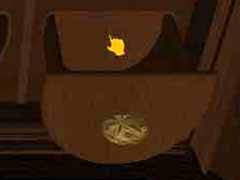
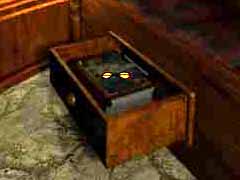
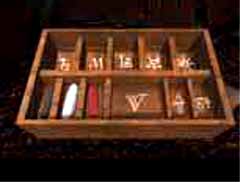 Click at it and pick up the Treasure Box. You won't get it in your Inventory, instead it appears at the bottom left of your screen and the chalks are automatically transferred to it. Every compartment bears a strange symbol. All things connected to the treasure hunt that you pick up are placed in the box not in the Inventory.
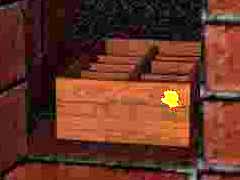
 Take the handle from the compartment.
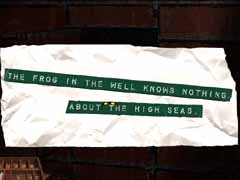
Read the clue from the paper.
"The frog in the well knows nothing about the High Seas."
Also take the shovel standing between the desk and the fireplace. Leave the library and go searching for the well.
Outside
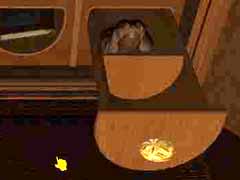
 At the well use the handle on the crank to the right of the well. A bucket is raised. Look at the frog at the handle and pick up the "Treasure" from it's mouth. (You know it is a treasure because it is placed in the Treasure Box not in the Inventory.)
Then take the paper from the bucket.
 Read it to get the next clue.
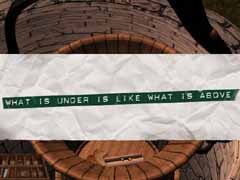
"What is under is like what is above."
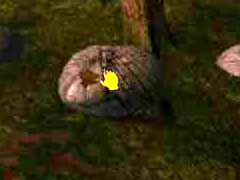
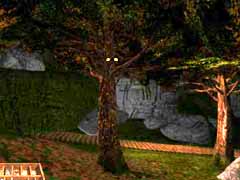
The next treasure is evidently hidden under the earth. Take the path to the left at the well and go one step forward. Turn left and go forward into the bushes. Turn left again and look down. There is a big stone.
 Click at the stone to move it.
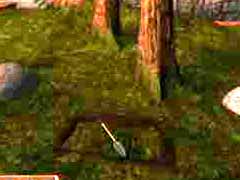
Then use the shovel at the place where the stone was.
Pick up the monocular and the "treasure".
 Read the next clue from the paper.
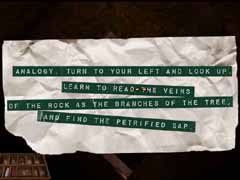
"Analogy. Turn to your left and look up. Learn to read the veins of the rock as the branches of the tree, and find the petrified sap.
Turn to the left towards the hole and look up. Search the branches until your pointer is turned into "the glasses". Then click to get a close-up
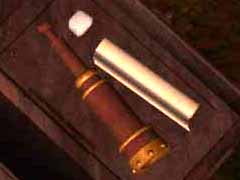
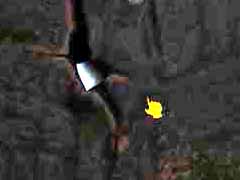 Use the monocular in the on the fork of the branch. Look at it and you'll see a cliff with a crack in it. Walk to the crack through the monocular. Take the treasure and the handle.
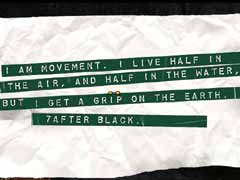
Read the next clue from the paper. "I am a movement. I live half in the air, and half in the water. But I get a grip on the earth. 7 after black."
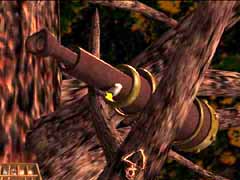
 You have to search for something with a missing handle near the water. To the right, at the back of the house, is a waterwheel. Put the handle at the right place to the left of the wheel. Use the handle to start the buckets moving. Start counting when you see the bucket with a black stripe. The next bucket is number one. When you see the top of bucket number 7 click the handle to stop the movement.
.
 It can be a bit tricky. If the bucket gets too high you can't look in it. Look at the border of the bucket to get a close-up. Click at the lock at the cover to open it. Pick up the key and the treasure. Read the paper to get the next clue.
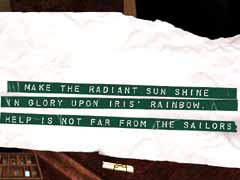
"Make the radiant sun shine in glory upon Iris' Rainbow. Help is not far from the sailors."
The Bedroom
 You have seen the rainbow earlier in the bedroom so return there.
Look in the drawer under the bed and take the prism. At the wall above the bed is a keyhole where you can use your newly found key.
Inside is a lever. Put it to the right. Nothing happens. You evidently have to do something more.
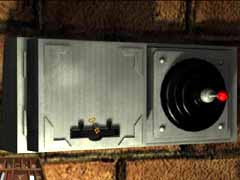
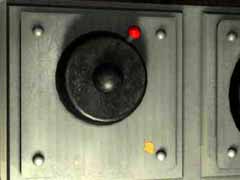
 Look at the small painted window to the left of the rainbow. Press the red button. A laser beam, jumping around the room, is stopped at the painted window near the bed. Look at it. It is a picture of sailors. The clue talked about sailors but also said that the light should shine at the rainbow. You must refract the light. Put the prism at the sailor's head.
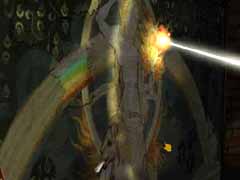
 The light is refracted. Follow the beam to the tapestry with the rainbow. The beam is pointing at the sun. Click at the sun and you'll find the next treasure. Click at the scroll in the lion's mouth and read the next clue.
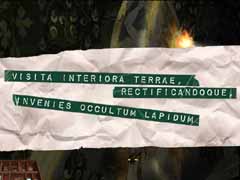
"Visita Interiora Terrae, Rectificandoque, Invenies Occultum Lapidum"
It is Latin and the first words mean: "Visit the interior of the earth."
 It must refer to the globe. Open it again. You'll find a treasure and a paper with the next clue. Read it.
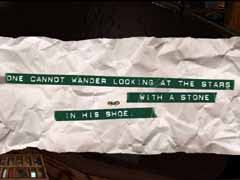
"One cannot wander looking at the stars with a stone in his shoe."
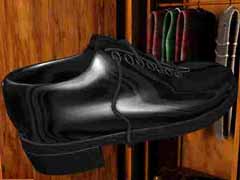
 A shoe. If it is a tidy person it ought to be in the closet. In the second closet from the left you'll find a shoe. Take a look at the heel and read the next clue.
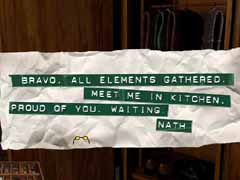
"Bravo. All elements gathered. Meet me in the kitchen. Proud of you. Waiting. Nath."
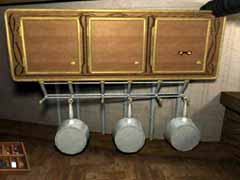
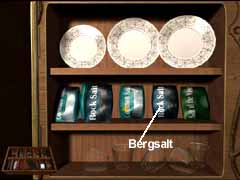 Exit the bedroom and go to the kitchen. It is the door to the right. Open the rightmost cupboard at the left wall. Get the Rock Salt. It is placed in your Treasure Box. Now all the compartments are filled.
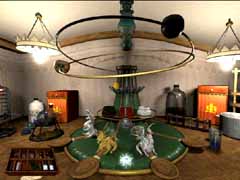
 Click at the strange apparatus at the table to get a close-up. Click again to start it.
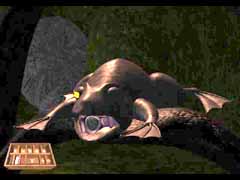
It takes the treasures one after one and creates your assistant Homunculus.
When he is alive you are both transferred to the park.
The Park
 Look up. A bulb is missing in the lamp. Use Homunculus to replace it.
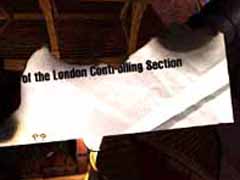
You'll meet Theodore again and hear why he created Dreamland and about the letter he found when Nathan had died.
It is the same letter you earlier found in the globe.
 When it is all over pick up the map of the park.
You'll get a new page in Theodores diary but it is only the letter that you already have read.
![]()
![]() The story is written by MegaZina and based on the game Faust from Cryo Interactive Entertainment.
The story is written by MegaZina and based on the game Faust from Cryo Interactive Entertainment.
The pictures are taken from the game. The homesite is private and has no connection with the named company